The diving board is probably the last thing you think about when it comes to your pool. Sure, we all enjoy it when we have one but it just sits there.. all year in the elements and yet we jump right on it year after year. Well, its time to have a look. Diving board failures happen near the center of the board. Take a look right at the fulcrum where the diving board bends. Do you see any cracking or splitting? That’s a sure sign of a possible failure. Wait.. that’s not all. When was the last time you took the diving board off? Removing the diving board requires removing the two nuts and two bolts at the back end of the board. Good Luck! If you sprayed a rust dissolver on the threads every day for a week you might be able to break the nuts loose. If you try to break them loose without first applying a rust dissolver you might damage the board or the base attempting to remove them. We have had to cut them off to pull the bolts out. Rusty nuts and bolts can lead to the board breaking loose when in use.
Ok, now we have the board off. Lets have a look at the diving board base. Yep.. just what I thought. Look down inside the base. You will see more bolts coming up inside the base with nuts and washers holding the base to the concrete deck under the diving board base. They are rusted aren’t they? These can be rusted so bad that the nuts and bolts are barely recognizable. especially if you have a salt pool.
Good News! This can all be fixed. Take a look at these pictures of a diving board and base replacement.
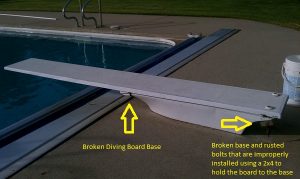 |
The arrows represent cracks in the diving board base and at the back end of the board rusted nuts and bolts held on by a 2×4 to keep the board attached to the base. At the fulcrum is a good place to check for actual cracks in the diving board. This was an accident waiting to happen. |
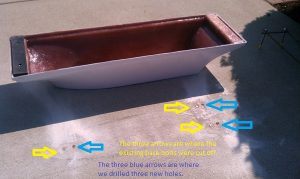 |
The yellow arrows are the existing diving board base bolts. The bolts are called a jig. The jig was set in the concrete when your pool was built and the concrete was poured around your pool. Years of exposure to the elements cause the bolts to rust. In this case we had to cut them off flush with the deck. |
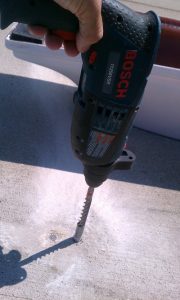 |
Each new hole is drilled with a Bosch Hammer Drill. We wrap tape around the drill bit to insure we do not drill too deep. |
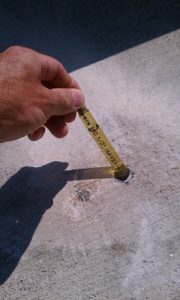 |
Every hole is blown out with air. A sealed vile of epoxy is inserted into each new hole. |
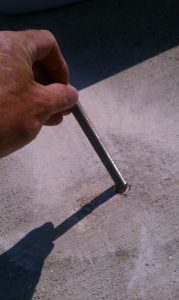 |
A new 1/2″ stainless steel bolt is hammered directly on top of the sealed glass vial of epoxy. A new bolt is inserted into every new hole the same way. The epoxy diving board mounting kit comes with four 1/2″ bolts and four sealed glass vials of epoxy. |
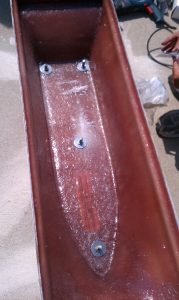 |
The new base mounting bolts hammered into their new holes, the base is placed on the new bolts, and all new washers and bolts are installed to hold the new diving board base to the ground. The new diving board is ready to be installed. |
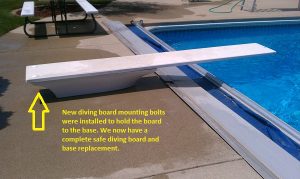 |
Remember the diving board mounting bolts were also rusted. We installed a new board bolt kit to hold the board to the base. The repair is complete. We now have a safe diving board and base for everyone to enjoy. |
Is your diving board safe? It’s time you have a look. Pool safety is our number one priority. Make it yours! Ask your pool dealer to inspect your diving board & base bolts today.


Need someone to check diving board for safety and replace nuts/ bolts holding it on. In Lake View Terrace/ Shadow Hills, Ca. area.
Lauri
Hi Lauri, Thank you for commenting. Crystal Clear Pools is located in Lafayette, Indiana. I have made a few calls looking for a pool service company that services your area. I found The Pool Man. The number I called is 818-766-5626. The Pool Man is not affiliated with Crystal Clear Pools but they are listed on google as a pool service business in your area. Thank again. Please feel free to reply or call us at 765-471-8180 with any questions you have.
Tim Graham